Step 1: Access the configuration interface
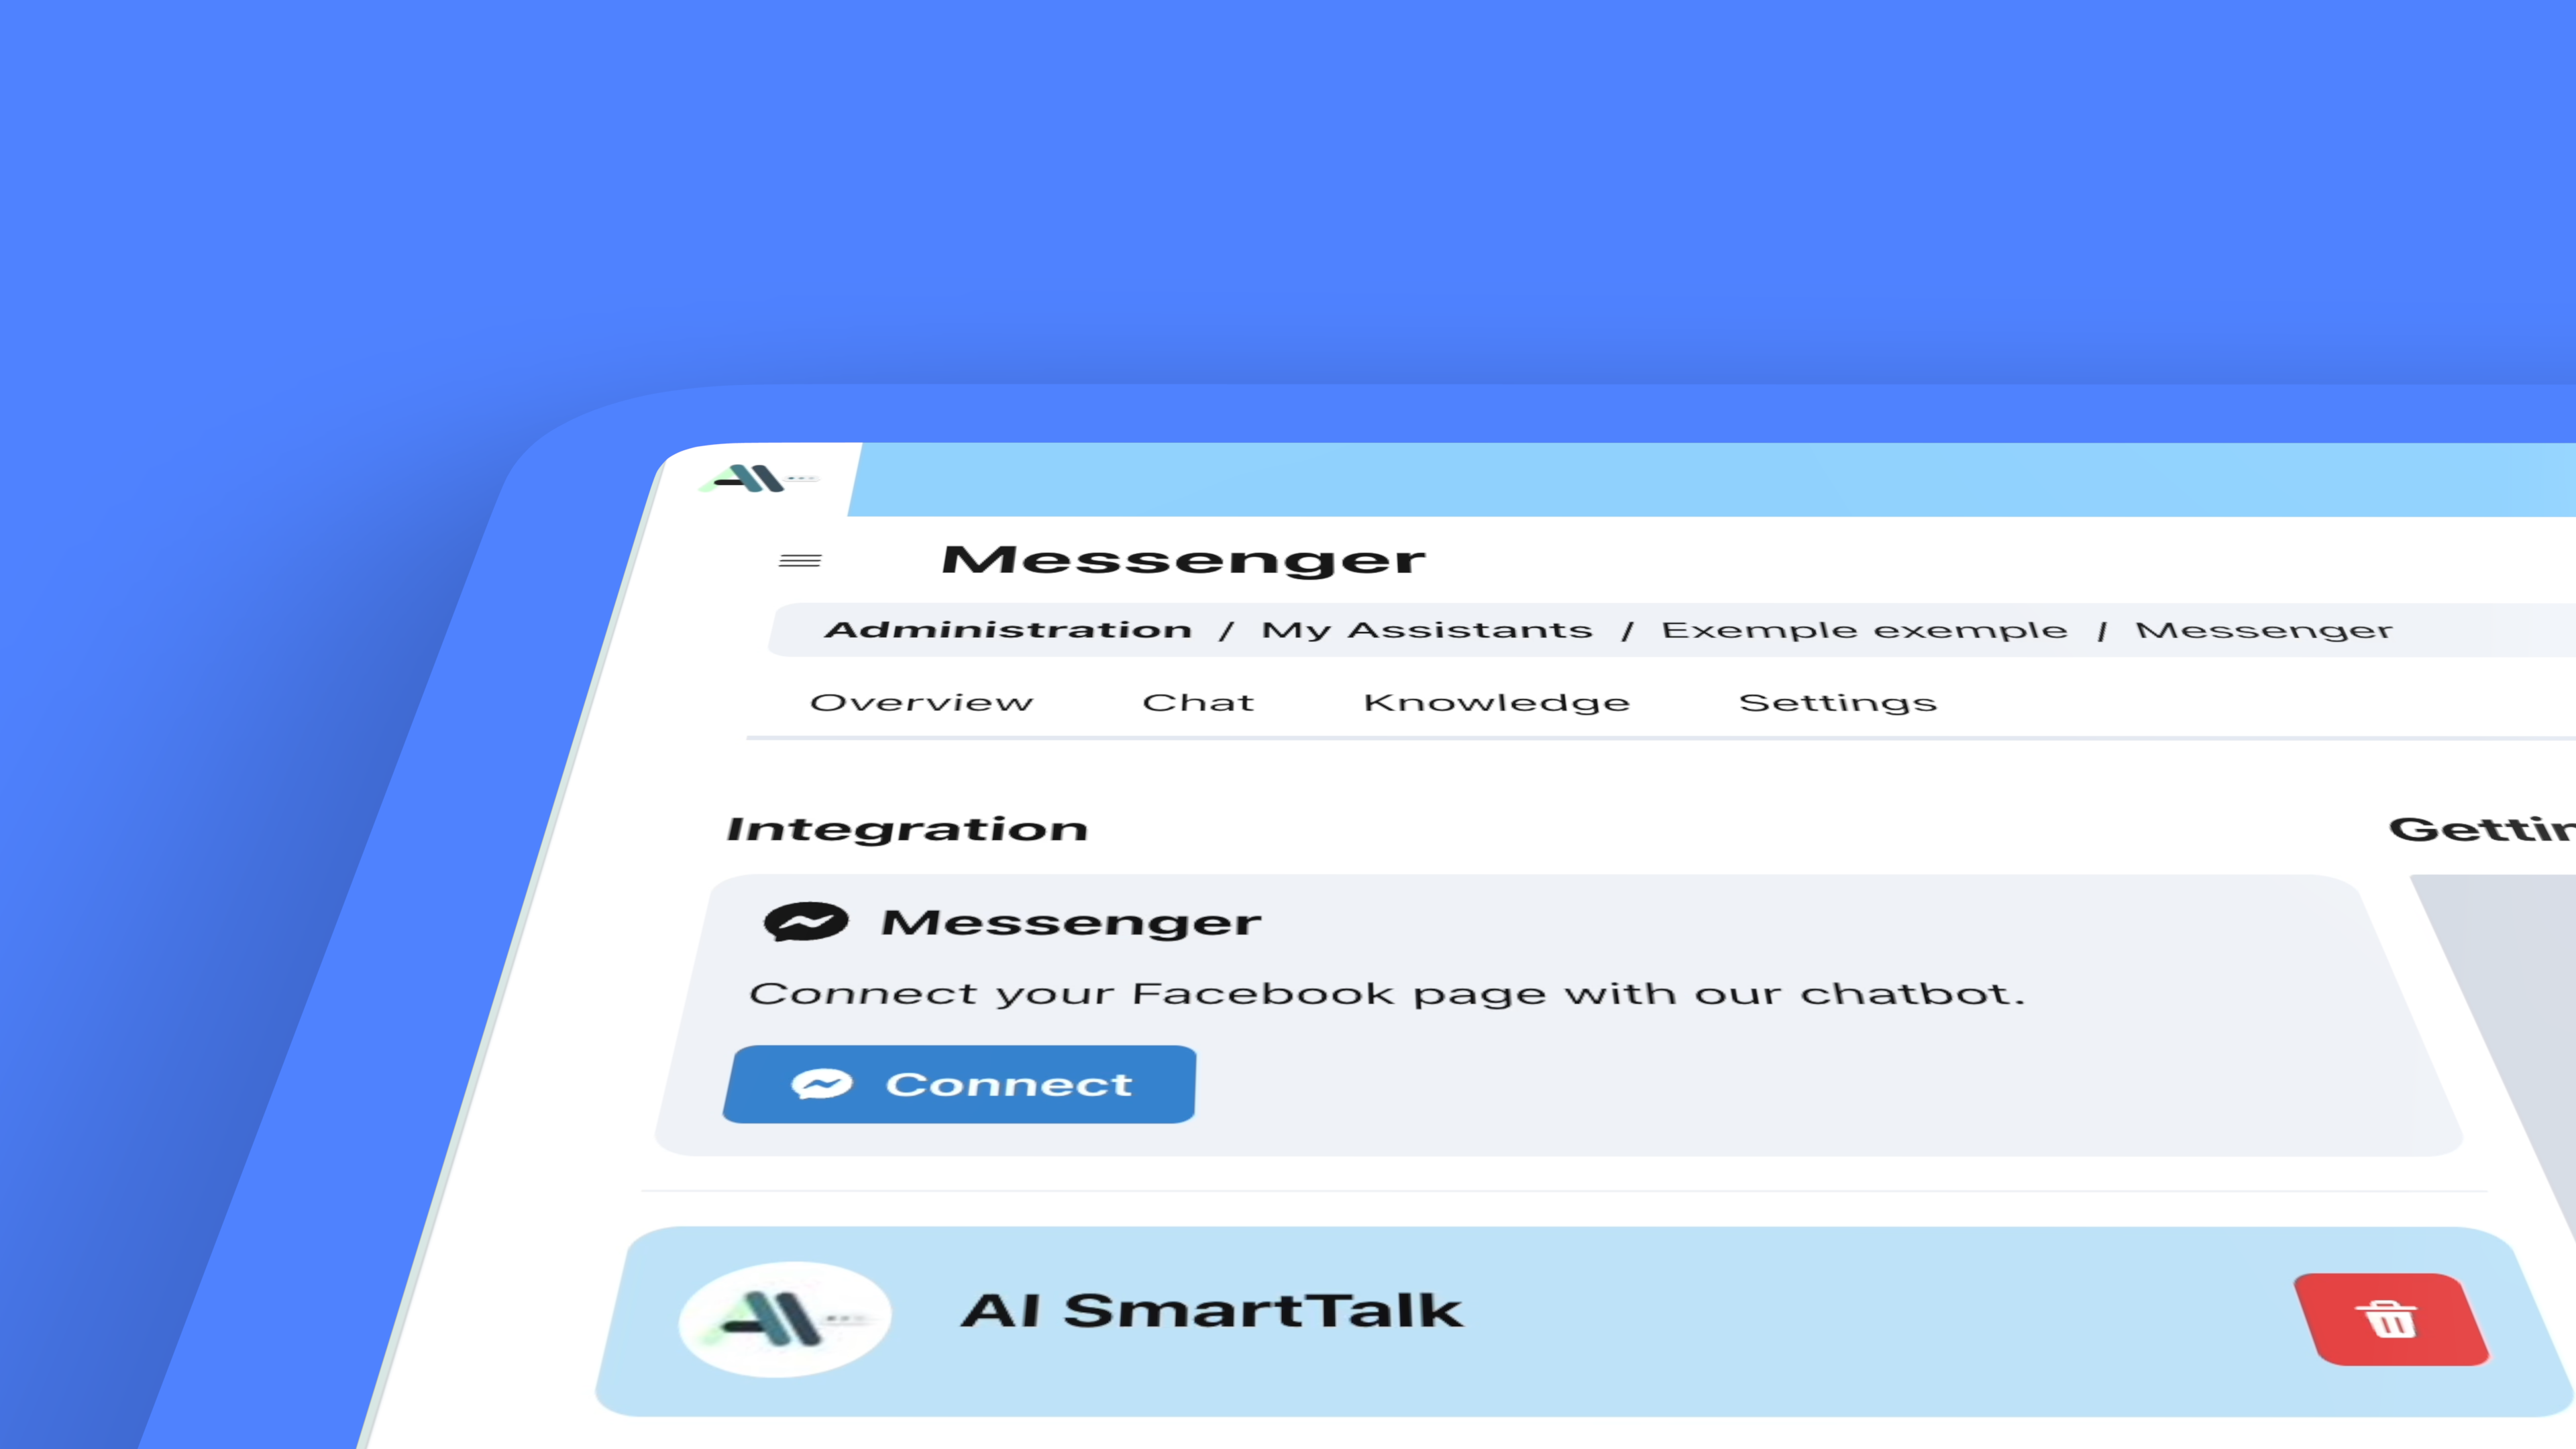
To begin, access the chatbot configuration page on your integration platform. You will see an interface similar to the one in the image above, with an option to connect Messenger.

Step 2: Connect your Facebook page
Click the “Connect” button to start the connection process. A Facebook window will open, asking you to log in to your Facebook account if you are not already. Make sure you are logged in with an account that has the necessary permissions to manage the Facebook page you want to integrate.

Step 3: Link your Facebook page
Once connected, Facebook will ask you to select the page you want to link. Choose the appropriate page from the list of pages managed by your account. Once selected, authorize the permissions requested by the chatbot to ensure a complete and functional integration.
Step 4: Finalize the integration
After linking your page, Facebook will redirect you to the configuration interface of your integration platform. You will now see your page listed as connected. At this point, your Facebook page is ready to receive messages via Messenger.
Step 5: Manage connections
If you wish to disconnect the page in the future, a button with a trash can icon will be available next to the connected page. By clicking this button, you can disconnect the chatbot from the Facebook page, thus canceling the integration.

Conclusion
Integrating Messenger to your Facebook page is a simple yet powerful step to enhance engagement with your customers. By following these steps, you can quickly and easily set up your chatbot to handle messages from your customers on Facebook. For more details on similar integrations, you can check out all our articles here: https://aismarttalk.tech/fr/getting-started
For more information or any additional questions, feel free to contact us. Happy integrating!


Leave a Reply